


Key Points on Implementing SLAM in Low-Cost Mobile Robots
Building DIY robots? Simultaneous Localization and Mapping, or SLAM, can be applied to low-cost parts. Think a Raspberry Pi or a Jetson Nano. Team that up with affordable sensors like an RPLIDAR. This setup lets hobbyists build autonomous robots without breaking the bank. Good news is, tools like ROS and algorithms such as Gmapping are open-source, making this pretty simple for beginners to jump into. Just know that the final map and location accuracy depend on your sensor quality and how busy the environment is.
In low light, lidar-based SLAM can be reliable than visual methods. However, each approach involves trade-offs regarding cost and processing power. There’s always debate about which algorithm to use. Gmapping is easier to use, but you might see more drift compared to advanced choices like Cartographer. This proves you'll need to tune and test whatever you choose.
Hardware Selection
Opt for Raspberry Pi 4 for basic setups or Jetson Nano for GPU-accelerated tasks. Pair with RPLIDAR A1 (~$100) for Lidar sensing, a differential drive chassis (~$50), and motor drivers. Total build under $300 possible. See examples at RPLIDAR and ROS programming.
Software Setup
Install ROS Noetic on Ubuntu for Raspberry Pi. Configure URDF for robot model and integrate sensor drivers. Visualize in RViz.
Algorithm Implementation
Use Gmapping for simplicity in mapping. Launch SLAM nodes, tune parameters like map resolution, and generate maps via teleop.
Localization and Navigation
Employ AMCL for pose estimation on built maps. Address common issues like sensor drift with parameter adjustments.
Practical Tips
Start small, test in controlled environments, and iterate. Resources like YouTube tutorials aid troubleshooting.
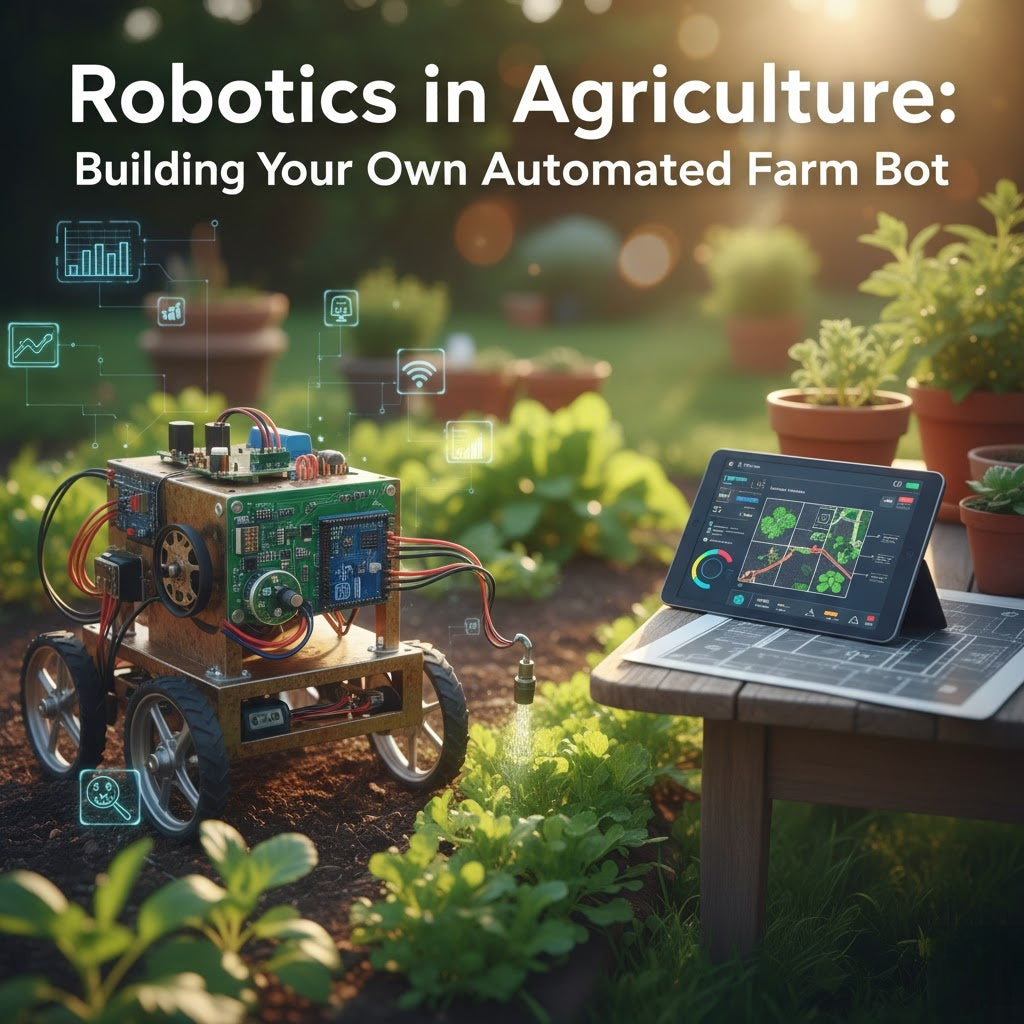
Are you a hobbyist or student eager to dive into robotics without breaking the bank? This hands-on tutorial walks you through SLAM implementation on a low-cost mobile robot, turning affordable parts into a smart mapping machine. We'll cover everything from hardware picks to software tweaks, emphasizing DIY robotics accessibility. By the end, you'll have a robot that can map rooms and locate itself—all on a budget.

Demystifying SLAM: Why Mapping and Localization are Crucial for DIY Bots
Mobile robots often struggle in unknown spaces—they need to figure out their position (localization) while sketching the surroundings (mapping). That's where SLAM, or Simultaneous Localization and Mapping, comes in. It solves both problems at once, letting your bot navigate autonomously.
Imagine a vacuum cleaner roaming your home: without SLAM, it might bump into walls endlessly. With it, the robot builds a map on the fly and tracks its spot, avoiding obstacles efficiently. For DIY robotics fans, this tech opens doors to fun projects like home explorers or delivery bots.
The best part? SLAM implementation isn't just for pricey labs anymore. Advances in open-source tools make it feasible for low-cost mobile robots. Students and hobbyists can experiment with localization and mapping using everyday hardware, sparking creativity in DIY robotics. Whether you're mapping a room or localizing in a maze, SLAM empowers affordable builds to act intelligently.
This accessibility stems from communities sharing code and tips, reducing barriers. As one study notes, SLAM has evolved from complex algorithms to user-friendly packages, democratizing robotics.
The Budget Build: Selecting Hardware for Your Low-Cost SLAM Platform
Building a low-cost mobile robot for SLAM implementation starts with smart hardware choices. Focus on components that balance performance and price, ensuring your DIY robotics project stays under $300.
The Brains: Choosing the Right Microcontroller/SBC
The core of your low-cost mobile robot is the single-board computer (SBC). We recommend the Raspberry Pi 4 (around $35-$75) for most SLAM implementations—it's powerful enough for ROS and handles basic processing for open-source SLAM algorithms.
For more demanding tasks, like real-time visual SLAM, opt for the NVIDIA Jetson Nano (~$99). Its GPU accelerates computations, making it ideal for Lidar or camera data in SLAM implementation. Justify the pick: Raspberry Pi suits beginners with lower power needs, while Jetson shines in complex mapping and localization.
Low-Cost Sensor Options: Lidar vs. Visual SLAM
Sensors are key for data in SLAM implementation. For Lidar, the Slamtec RPLIDAR A1 (~$99) is a top budget choice—it's reliable for 360-degree scans, essential for accurate mapping in low-cost mobile robots.
Compare to visual SLAM using cameras like Raspberry Pi Camera (~$25). Visual SLAM is cheaper but struggles in low light or textureless areas, increasing localization errors. Lidar excels in consistency, though it's pricier. For this tutorial, we'll use RPLIDAR with ROS for straightforward integration in open-source SLAM.
Pros of Lidar: Direct distance measurements reduce drift.
Cons of visual SLAM: Higher computational load on your SBC.
Chassis and Motor Control
A simple differential drive chassis (~$30-$50) works best for low-cost mobile robots—two wheels for easy turns, plus casters for stability. Pair with DC motors and a driver like L298N (~$5) for control via your SBC.
Assemble: Mount the SBC and sensor on the chassis. This setup supports SLAM implementation by providing odometry data for localization. Affordable kits are available on Amazon or AliExpress, perfect for DIY robotics.
|
Component
|
Recommended
|
Price Range
|
Why for SLAM?
|
|
SBC
|
Raspberry Pi 4
|
$35-75
|
Handles ROS and basic open-source SLAM
|
|
Sensor
|
RPLIDAR A1
|
$99
|
Reliable Lidar for mapping and localization
|
|
Chassis
|
Differential drive kit
|
$30-50
|
Simple kinematics for low-cost mobile robot
|
|
Motor Driver
|
L298N
|
$5
|
Easy integration with ROS
|
This hardware keeps your build economical while enabling robust SLAM.
The Foundation: Setting Up the ROS Environment for SLAM
ROS (Robot Operating System) is the backbone for SLAM implementation in low-cost mobile robots. This section guides you through setup, focusing on ROS for seamless integration with Lidar and open-source SLAM.
ROS Installation and Kinematics Setup
Start with Ubuntu 20.04 on your Raspberry Pi (or Jetson). Install ROS Noetic:
-
Add ROS repository:
sudo sh -c 'echo "deb http://packages.ros.org/ros/ubuntu $(lsb_release -sc) main" \ > /etc/apt/sources.list.d/ros-latest.list' sudo apt install curl curl -s https://raw.githubusercontent.com/ros/rosdistro/master/ros.asc \ | sudo apt-key add - sudo apt update -
Install desktop version:
sudo apt install ros-noetic-desktop-full -
Setup environment:
echo "source /opt/ros/noetic/setup.bash" >> ~/.bashrc
source ~/.bashrc
For kinematics, create a URDF file describing your low-cost mobile robot:
<robot name="my_robot">
  <link name="base_link"/>
  <joint name="lidar_joint" type="fixed">
    <parent link="base_link"/>
    <child link="lidar_link"/>
    <origin xyz="0 0 0.1" rpy="0 0 0"/>
  </joint>
  <link name="lidar_link"/>
</robot>
Useroslaunch urdf_tutorial display.launch model:='$(find my_package)/urdf/my_robot.urdf'to visualize. This sets up ROS for SLAM implementation.
Sensor Driver Integration
For your Lidar in ROS:
-
Clone RPLIDAR package:
cd ~/catkin_ws/src git clone https://github.com/Slamtec/rplidar_ros.git cd .. catkin_make
-
Set permissions and launch:
sudo chmod 666 /dev/ttyUSB0
roslaunch rplidar_ros rplidar.launch
-
Visualize in RViz:
rosrun rviz rviz
Add LaserScan topic
/scan. This confirms data flow for open-source SLAM in your low-cost mobile robot.Core Implementation: Open-Source SLAM Algorithms in Practice
This is the heart of SLAM implementation—applying open-source SLAM on your low-cost mobile robot with ROS and Lidar.
Choosing Your Algorithm: Gmapping vs. Cartographer
Gmapping is particle filter-based, simple for beginners, but prone to drift without good odometry. Cartographer uses optimization for better accuracy and loop closure, ideal for larger spaces but more resource-heavy.
Gmapping
-
Pros: Easy setup, low CPU use on Raspberry Pi.
-
Cons: Weaker in dynamic environments.
Cartographer
-
Pros: Superior mapping quality.
-
Cons: Needs more power, like Jetson Nano.
For this tutorial, we'll use Gmapping for its simplicity in low-cost mobile robots.
Configuration File Deep Dive
Install Gmapping:
sudo apt install ros-noetic-gmapping
Edit params in a launch file (e.g., gmapping.launch):
<launch>
  <arg name="scan_topic" default="/scan" />
  <arg name="base_frame" default="base_link"/>
  <arg name="odom_frame" default="odom"/>

  <node pkg="gmapping" type="slam_gmapping" name="slam_gmapping" output="screen">
    <param name="base_frame" value="$(arg base_frame)"/>
    <param name="odom_frame" value="$(arg odom_frame)"/>
    <param name="map_update_interval" value="5.0"/>
    <param name="maxUrange" value="5.5"/> <!-- Matches RPLIDAR A1 -->
    <param name="maxRange" value="6.0"/>
    <param name="sigma" value="0.05"/>
    <param name="kernelSize" value="1"/>
    <param name="lstep" value="0.05"/>
    <param name="astep" value="0.05"/>
    <param name="iterations" value="5"/>
    <param name="lsigma" value="0.075"/>
    <param name="ogain" value="3.0"/>
    <param name="lskip" value="0"/>
    <param name="minimumScore" value="200"/>
    <param name="srr" value="0.01"/>
    <param name="srt" value="0.02"/>
    <param name="str" value="0.01"/>
    <param name="stt" value="0.02"/>
    <param name="linearUpdate" value="0.5"/>
    <param name="angularUpdate" value="0.436"/>
    <param name="temporalUpdate" value="-1.0"/>
    <param name="resampleThreshold" value="0.5"/>
    <param name="particles" value="80"/> <!-- Balanced for low-cost SBC -->
    <param name="xmin" value="-50.0"/>
    <param name="ymin" value="-50.0"/>
    <param name="xmax" value="50.0"/>
    <param name="ymax" value="50.0"/>
    <param name="delta" value="0.05"/> <!-- Map resolution -->
    <param name="llsamplerange" value="0.01"/>
    <param name="llsamplestep" value="0.01"/>
    <param name="lasamplerange" value="0.005"/>
    <param name="lasamplestep" value="0.005"/>
    <remap from="scan" to="$(arg scan_topic)"/>
  </node>
</launch>
Key explanations:
-
maxUrange and maxRange: Limit to RPLIDAR's capabilities (5.5-6m) for accurate readings.
-
particles: 80 provides good accuracy without overwhelming Raspberry Pi CPU.
-
delta: 0.05m resolution balances detail and performance.
-
map_update_interval: 5s reduces load on low-cost hardware.
-
xmin/ymin/xmax/ymax: Set bounds to expected environment size; smaller for memory savings.
Tune these based on testing—lower particles (e.g., 50) if CPU spikes.
| Parameter | Default | Adjustment for Low-Cost | Impact on SLAM |
| delta | 0.05 | 0.1 | Coarser map, faster on Raspberry Pi |
| particles | 30 | 50-80 | Better accuracy without overload |
| maxUrange | 16 | 5.5 | Matches RPLIDAR for precise mapping |
| map_update_interval | 5 | 10 | Reduces processing frequency |
| linearUpdate | 1 | 0.5 | Triggers updates on smaller movements |
Launch with
roslaunch my_package gmapping.launch.Generating the Map (Mapping)
With configuration set, generate the map through exploration. This step uses Gmapping to process Lidar scans and odometry in real-time, building an occupancy grid.
Prerequisites Check
-
Ensure good odometry: Test with rostopic echo /odom—inaccurate wheel data causes drift. Add encoders if needed.
-
Verify TF: Run rosrun tf tf_monitor to confirm frames (map → odom → base_link → lidar_link).
-
Test Lidar alone: Place objects and check /scan for correct distances.
Launch Sequence
-
Start ROS core:
roscore
-
Run Lidar:
roslaunch rplidar_ros rplidar.launch
roslaunch rplidar_ros rplidar.launch
-
Launch Gmapping (using your launch file):Gmapping initializes particles and subscribes to /scan and /tf. Terminal output shows updates like "Scan processed" or particle resampling.
rosrun teleop_twist_keyboard teleop_twist_keyboard.py
-
Start RViz:
roslaunch gmapping slam_gmapping.launch
-
Fixed Frame: map
-
Add Map (/map): Shows building map.
-
Add LaserScan (/scan): Displays raw rays.
-
Add PoseArray (/particlecloud): Visualizes localization uncertainty.
-
Teleoperate:
rosrun teleop_twist_keyboard teleop_twist_keyboard.py
-
Move slowly (0.1-0.3 m/s) to allow accurate integration.
-
Strategy: Start in open area, move in figure-8s or loops for loop closure (reduces errors).
-
Cover edges and revisit spots—Gmapping refines with overlapping scans.
-
In RViz: Map starts blank, then expands. White=free, black=occupied, gray=unknown. Particles converge as confidence grows.
Expect: Initial map small; grows to room size in 5-15 minutes. If environment is 10x10m, set larger xmin/ymax in config.
-
Saving the Map
mkdir -p ~/catkin_ws/src/my_package/maps
cd ~/catkin_ws/src/my_package/maps
rosrun map_server map_saver -f my_map
-
Generates my_map.pgm (image) and my_map.yaml (config with resolution ~0.05m, origin).
-
View PGM in an image editor; edit manually if needed (e.g., fill gaps) using tools like GIMP.
Post-Processing and Verification
-
Load saved map: rosrun map_server map_server my_map.yaml
-
Test: Relaunch RViz—map should appear static.
-
If distorted, re-run with better odometry or switch to Cartographer for advanced loop closure.
Troubleshooting
-
Map not building: Check remaps (scan topic mismatch). Use rostopic info /scan.
-
Drift/Distortion: Calibrate wheels; add IMU for fusion. Slow down—RPLIDAR short range (6m) limits in large/open areas.
-
High CPU: Lower particles to 50; increase temporalUpdate.
-
No loop closure: Revisit areas; ensure consistent lighting/surfaces.
-
Errors like "Dropped messages": Increase queue sizes in launch.
| Issue | Cause | Fix |
| No map updates | Topic mismatch | Remap scan:=/scan; check rostopic |
| Drift | Poor odometry | Add encoders; drive slower |
| Incomplete map | Insufficient exploration | Use systematic paths; loops for closure |
| CPU overload | High particles | Reduce to 50-60; larger update interval |
Beyond Mapping: Real-Time Localization and Navigation
With your map ready, advance to localization and navigation in your low-cost mobile robot using ROS.
Implementing AMCL for Localization
AMCL (Adaptive Monte Carlo Localization) tracks pose on a known map. Install:
sudo apt install ros-noetic-amcl
Launch:
-
Load map:
rosrun map_server map_server my_map.yaml
-
Run AMCL:
<node pkg="amcl" type="amcl" name="amcl">
  <param name="min_particles" value="500"/>
  <param name="max_particles" value="3000"/>
  <param name="kld_err" value="0.02"/>
</node>
-
In RViz, add PoseArray for particles. Set initial pose with 2D Pose Estimate tool. AMCL refines localization as the robot moves.
Troubleshooting Common SLAM Errors
Low-cost sensors like RPLIDAR can cause drift—fix by calibrating odometry or increasing update rates. Poor loop closure? Switch to Cartographer for better handling.
Common fixes: Boost
map_update_interval for dynamic spaces; add IMU for stability in DIY robotics.|
Issue
|
Cause
|
Fix
|
|
Drift
|
Sensor noise
|
Tune AMCL particles; add encoders
|
|
Loop Closure Fail
|
Large areas
|
Use Cartographer; slow movement
|
|
Localization Loss
|
Fast turns
|
Lower speed; improve Lidar mount
|
Next Steps: Path Planning
Use ROS Navigation Stack for autonomy:
sudo apt install ros-noetic-navigation
Launch move_base with your map and AMCL. Set goals in RViz—your low-cost mobile robot plans paths, avoiding obstacles.
This wraps our tutorial—experiment and scale your DIY robotics projects!